Tangent Lines to Curved Segments in Logo Design
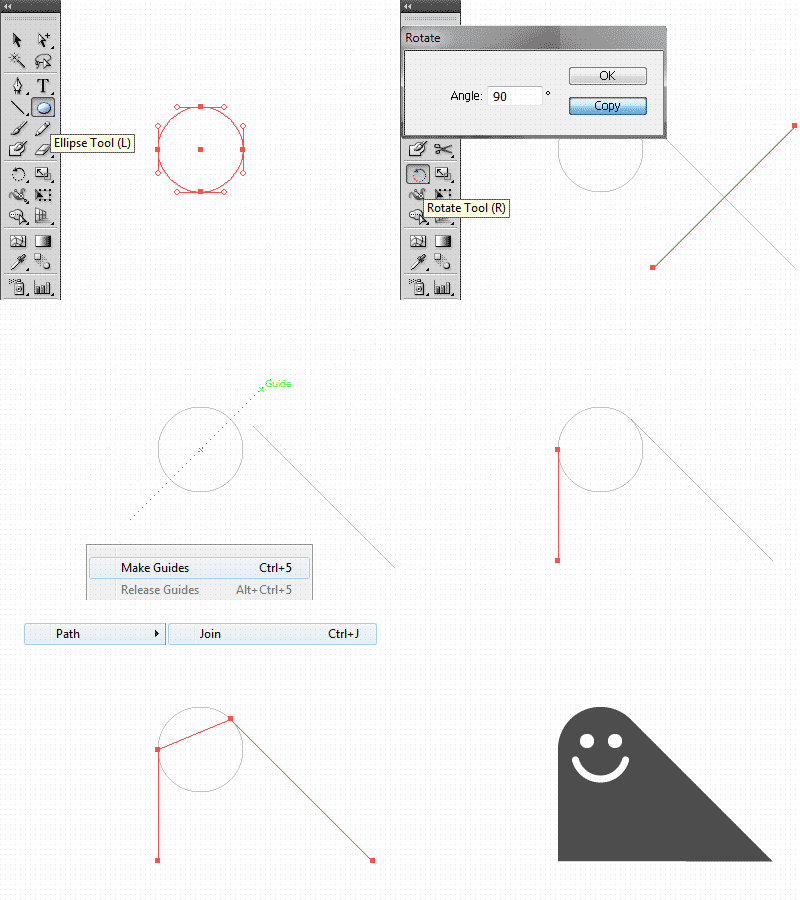
For the last couple of months a few people asked how to connect a tangent line to a curved segment in order to create a smooth geometrically correct transition from a curve to a straight line. I promised to make a little GIF animation to explain this method.
So, if you ever wondered how to make tangent lines to a curved path by hand, in order to create a smooth transition of any angle, here's one trick I've been using for quite some years. It's the most precise method I know:
1. Make a circle and add any angled line. 2. Select that line, double-click the Rotate tool, enter 90° and hit Copy. 3. Move the copied line to the exact centre of your circle. 4. Convert copied line into a guide (Alt + Option/shift + 5) 5. Select the first angled line and move its starting point to the position where the circle and the guideline intersects, assuming your Smart Guides are active (ctrl / command + U). You may adjust your Smart Guides settings accordingly to achieve maximum snapping control. The maximum snapping tolerance is 10pt.
You angled line is now in perfect tangent position.
It's one of the oldest requested features for Illustrator, but I guess Adobe never felt the urge to add such a basic geometric feature until date. Luckily there are scripts and plug-ins to make this process effortless.
Some weapons of mass construction
One of the best plug-ins I've seen and still use today are the following three favourites:
Xstream Path by CValley.
VectorScribe by Astute Graphics.
For a few bucks each one of these plug-ins offer you a very powerful set of editing tools within Illustrator.
