How I made this teasing video for Publer in 4 easy steps:
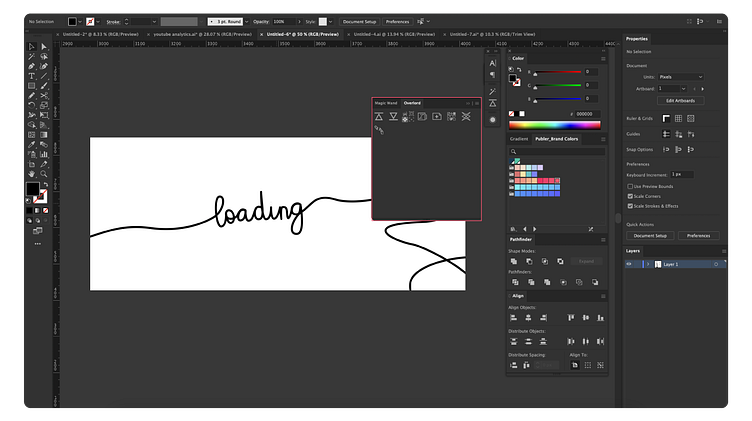
Step 1: Creating the BaseLine
Create the line in Adobe Illustrator.
Transfer the line to After Effects using the Overlord plugin.
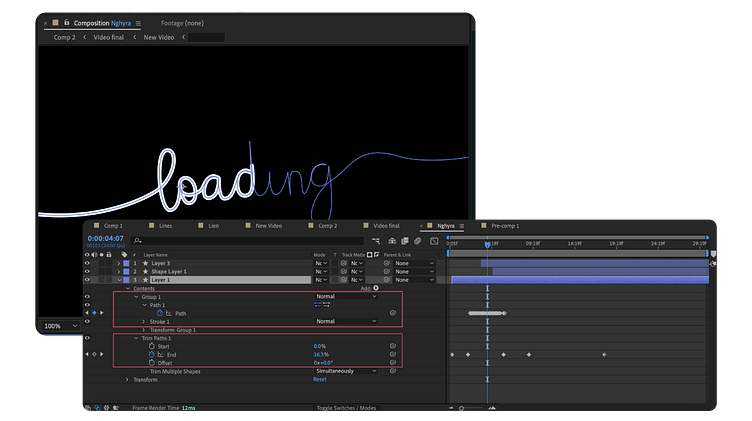
Step 2: Animating in After Effects
Use Trim Path and Position to animate the line, creating basic movements.
To add some flair, animate the path of the shape to introduce a bit of bouncing in the words and the logo at the end.
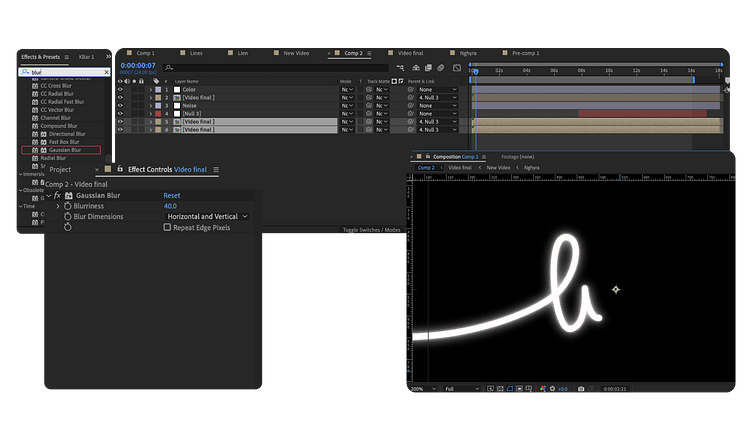
Step 3: Adding Effects for the Final Look
Duplicate the layer and apply Gaussian Blur.
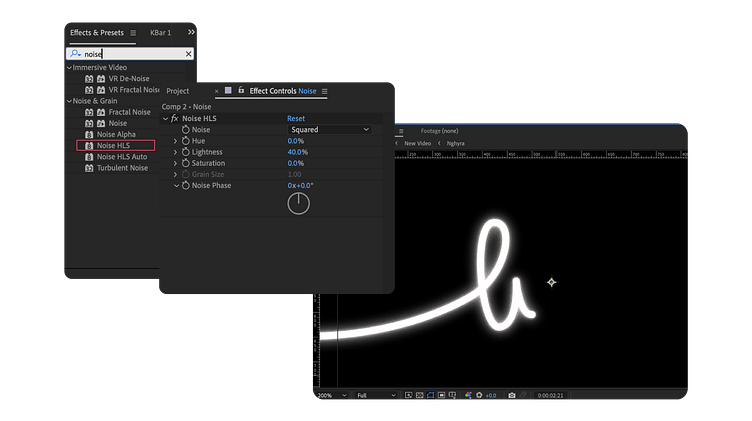
Create an adjustment layer and add Noise HSL to increase the lightness using (Hue, Saturation, Lightness) to give the glow some texture.
Create an adjustment layer and add Noise HSL to increase the lightness using (Hue, Saturation, Lightness) to give the glow some texture.
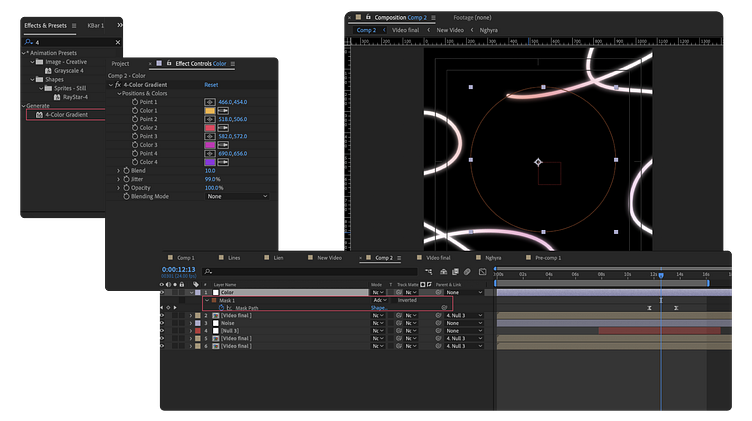
Step 4: Adding Color Effects
Create a shape and apply 4 gradient effects with the colors of your choice.
Make a mask with the shape of your logo to achieve the desired look.
And that’s it! With these simple steps, you can create engaging and dynamic teaser videos for your brand. Experiment with different effects and colors to make your animations stand out. Happy animating!