Electric Scooter HMI Display

Dribbble only allows Video Files of upto 20 Mb hence the lower quality.
Higher Quality Video can be found here : 1080p.mp4
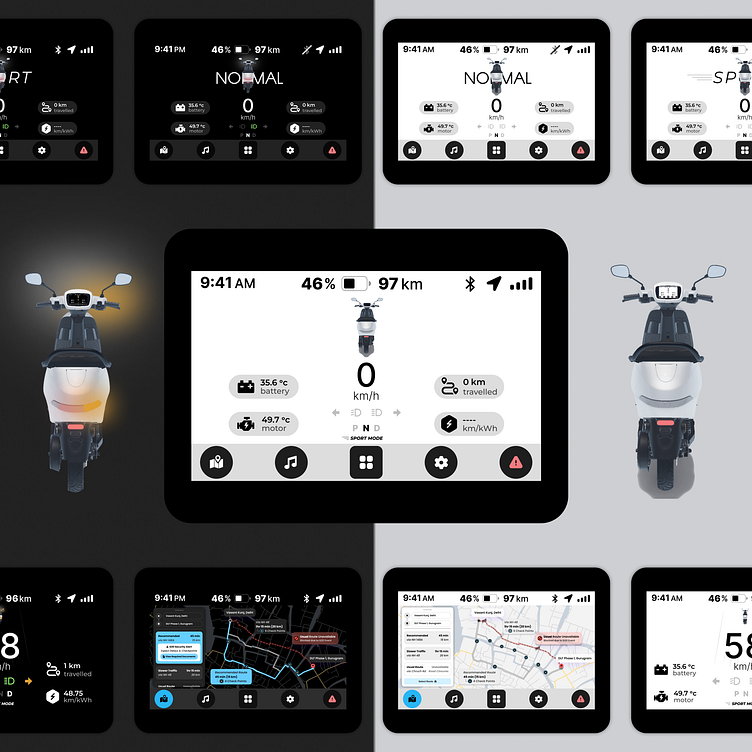
7 Inch HMI Design for Two-Wheeler EV Scooter: Default View Overview
Introduction to Dashboards
In the realm of data visualization, dashboards generally exist in two forms: analytical and operational.
Analytical Dashboards:
These provide users with at-a-glance information used for analysis and decision-making but do not have the same level of time sensitivity as operational dashboards. For instance, a sales dashboard updated once a day keeps managers aware of fluctuating sales data that will later demand thoughtful analysis. Analytical dashboards are used to identify trends, opportunities, and potential issues, helping users plan and strategize effectively.
Operational Dashboards:
These aim to impart critical information quickly to users as they are engaged in time-sensitive tasks. They are essential for monitoring scenarios like server availability, patient vitals during surgery, vehicle dashboards, or flight traffic. Operational dashboards typically present data that is continuously updating and changing, allowing users to make immediate decisions and take prompt actions.
For example, a vehicle dashboard is an operational dashboard that continuously provides real-time updates on speed, fuel levels, engine temperature, and other critical parameters. These elements help the driver make immediate decisions to ensure safe and efficient driving.
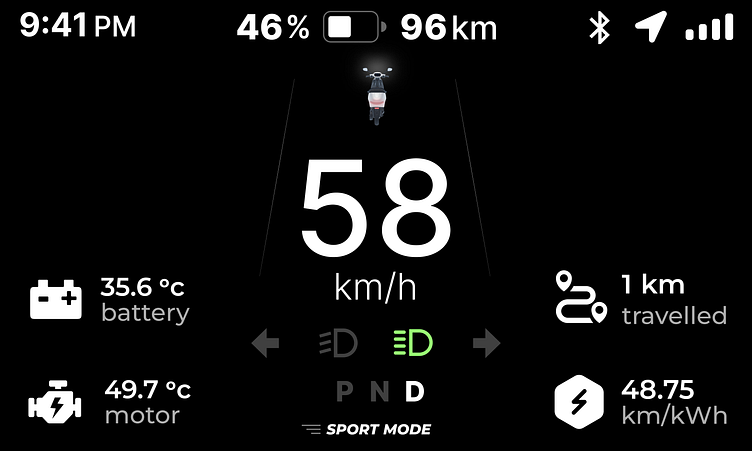
Given the critical nature of information presented, the HMI design for our two-wheeler EV scooter is primarily an operational dashboard. Let's delve into the design specifics of the default view, also known as the factory default view.
1. Top Status Bar
The top status bar of the HMI is designed to provide essential information quickly and intuitively, following key UX principles:
Placement: The status bar is at the top of the screen, similar to mobile devices and tablets. This alignment with familiar interfaces ensures users can intuitively access and utilize the HMI, adhering to Jacob's Law: "Users spend most of their time on other sites, so users prefer your site to work the same way as all the other sites they already know."
Importance: This design choice is crucial because it ensures that anyone riding the vehicle, even if they are unfamiliar with it, can easily and intuitively navigate the HMI. For example, if someone borrows the scooter from a friend, they can quickly understand and use the interface without any prior experience. This reduces the learning curve and potential distractions, enhancing safety and user experience.
Contents: The status bar includes the time on the left, a battery indicator in the center, and connectivity icons (WiFi, GPS, cellular network) on the right. This layout ensures the most crucial information is easily accessible and minimizes eye movement, following Fitts's Law: "The time to acquire a target is a function of the distance to and size of the target." By placing the status bar at the top, the distance the eyes need to travel from the road to the display is minimized, enhancing safety and usability.
Battery Information
Central Battery Icon: The battery icon is centrally located, with the remaining battery percentage on its left and the remaining range on its right.
This layout follows Gestalt's Law of Proximity and Fitts's Law, which states that objects near each other appear related, making it easy to understand the battery status at a glance.
Expandable Functionality: Tapping or pulling down the status bar expands it, overlaying additional details such as battery health, signal strength, or current weather conditions. This design choice enhances user interaction by keeping the main screen clutter-free yet informative.
2. Main Display Area
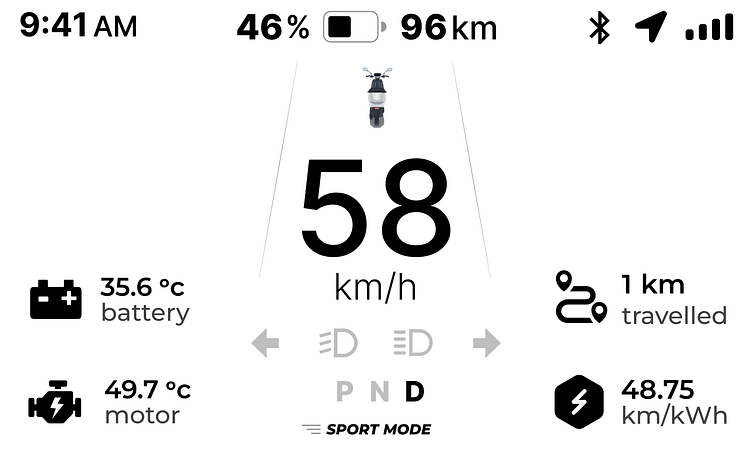
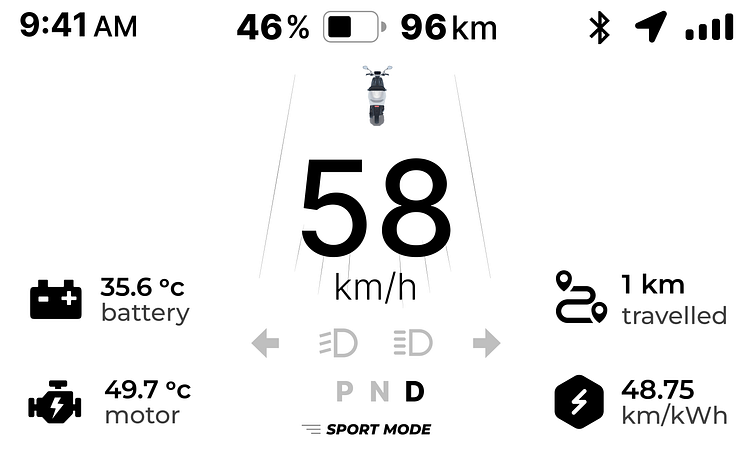
3D Model of Scooter:
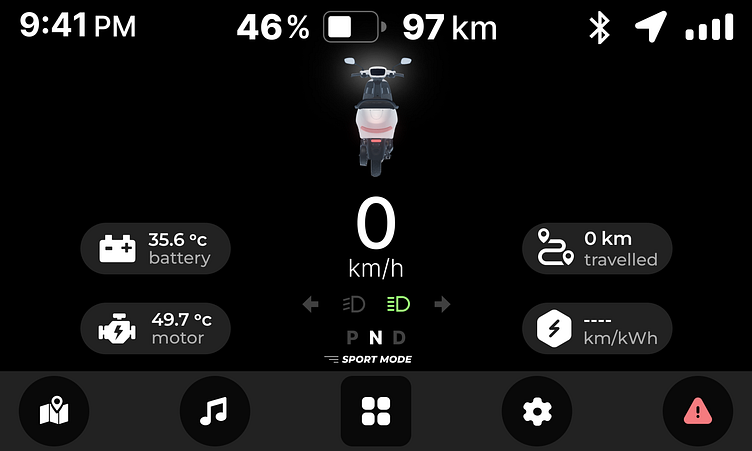
Real-Time Status Feedback: Below the status bar, a detailed 3D model of the scooter provides real-time visual feedback. This model shows the scooter's status, including tire pressure and indicator lights, enhancing situational awareness. This interactive model dynamically reflects real-time changes, such as turning indicators or headlights or whether the scooter is in motion or stationary ("Neutral" or "Parked" mode), akin to a simulation. For example, if the tire pressure is low, the specific tire will be highlighted, bringing it to the rider’s attention intuitively and elegantly.
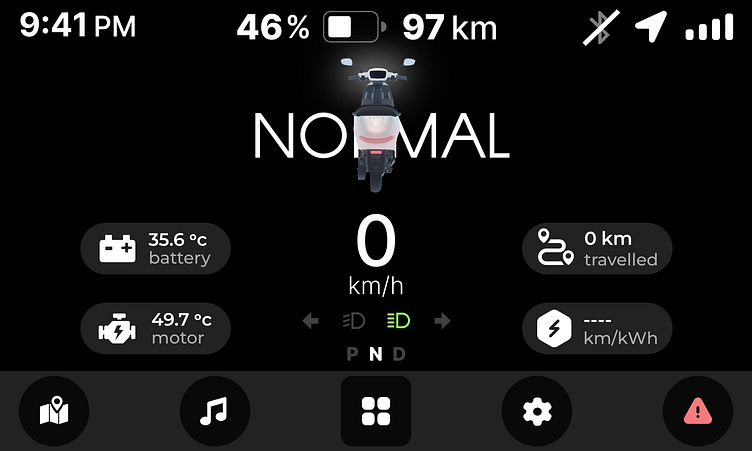
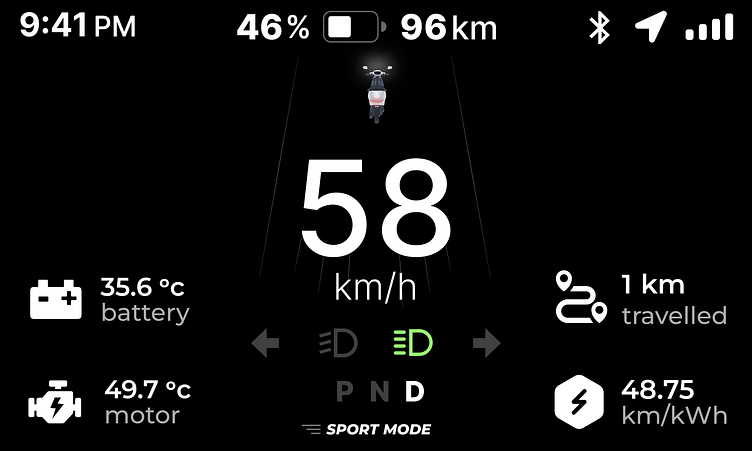
Adaptive Display: During nighttime riding, the HMI adapts with inverted colors, akin to automotive displays. This adjustment enhances visibility without causing distraction, ensuring safety during low-light conditions.
3. Prominent Digital Speedometer and Feedback Indicators:
Speedometer
Positioned below the 3D model, a large-format digital speedometer ensures that riders can instantly monitor their speed. This design choice follows the principles of visual hierarchy and clarity, essential for quick glances without diverting attention from the road.
The digital speedometer features a large font for speed, with the unit (km/h) in a smaller font below. This ensures quick readability, crucial for an operational dashboard. Similar to a traditional vehicle dashboard, where the speedometer provides real-time speed updates, this element is central to ensuring the rider maintains safe speeds.
Feedback Indicators
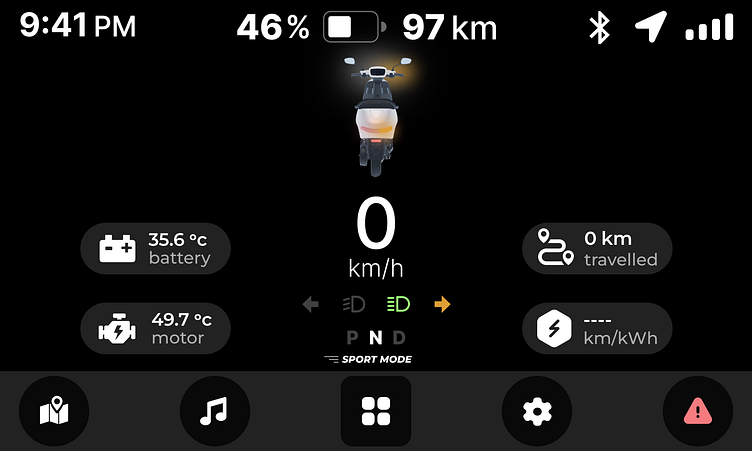
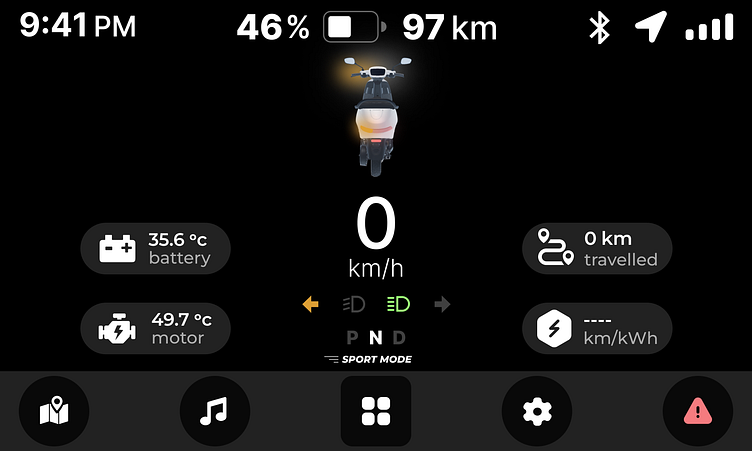
Lighting Indicators: Below the speedometer, icons indicate the status of the vehicle's lights (left indicator, low beam, high beam, right indicator).
These icons provide immediate feedback when lights are in use, with green for beams and blinking golden yellow for indicators, ensuring visibility and comprehension under varying lighting conditions.
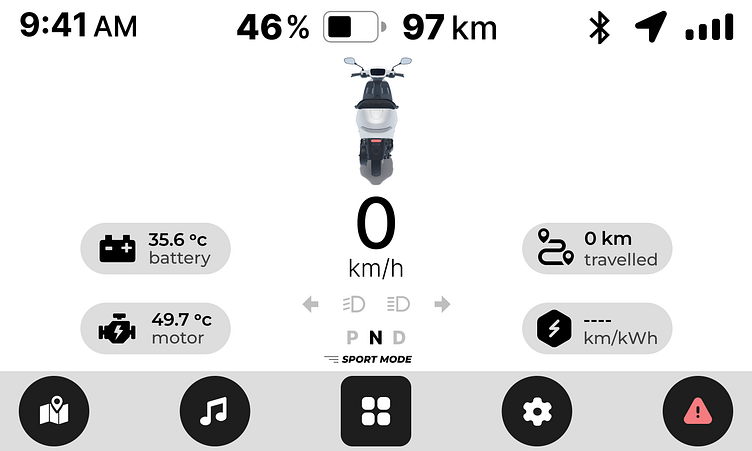
Drive Mode Indicator: The drive mode is displayed as "P N D" (Park, Neutral, Drive), with the active mode highlighted in full opacity.
This clear feedback ensures the driver knows the current mode at a glance.
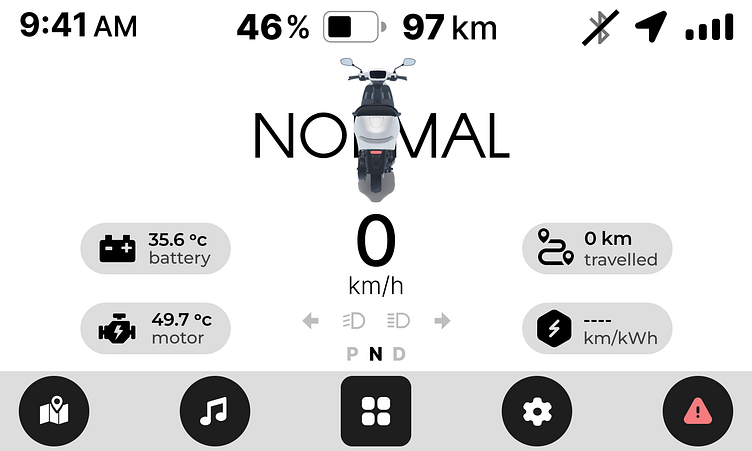
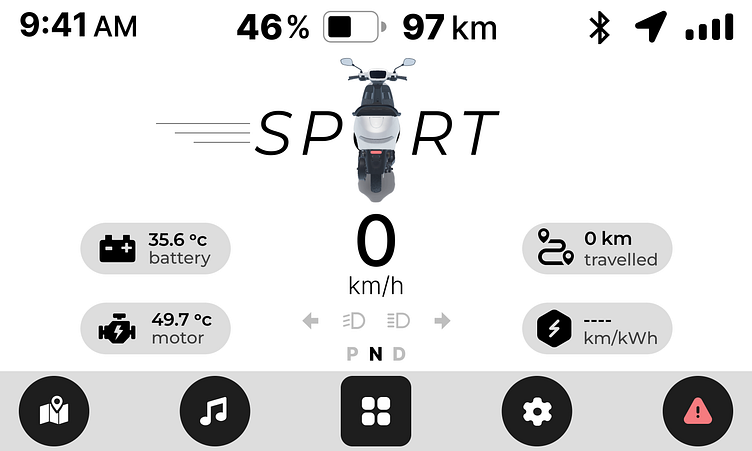
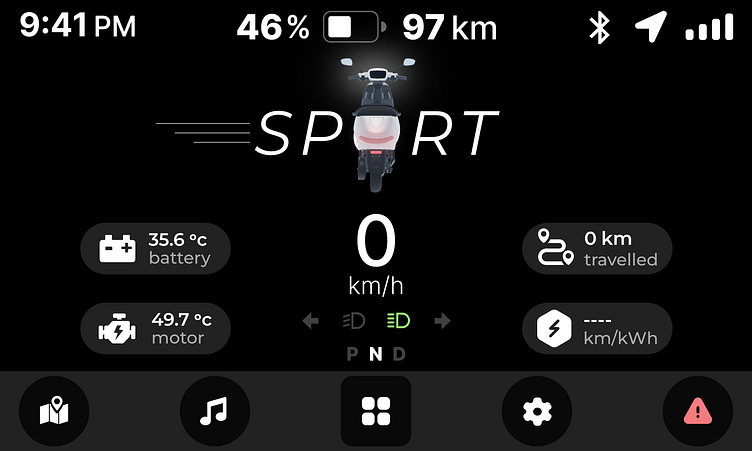
Driving Mode: Below the drive mode indicator, the current driving mode (Sport, Eco, Normal) is displayed with corresponding icons.
Changes in driving mode are prominently shown in the center of the screen before transitioning to a smaller display at the bottom, ensuring clear visibility.
4. Pill-Shaped Operational Buttons for Auxiliary Information:
Temperature and Trip Information:
Surrounding the speedometer are pill-shaped buttons displaying battery temperature (top left), motor temperature (bottom left), distance traveled (top right), and mileage (bottom right). These buttons are large and easily visible, grouped logically following Gestalt's Law of Proximity and Common Region, and are easy to interact with due to their size and spacing, adhering to Fitts's Law.
5. Dock and Interaction
Dock
The bottom-most part of the HMI features a dock with icons for navigation, music, app menu, settings, and reporting issues. These icons are strategically spaced and shaped (circular for media and settings, rectangular for app menu).
Icon Layout and Shape:
1. Circular Icons:
Icons for media, settings, and primary functions are circular, adhering to Fitts' Law to provide ample touch target area, even with gloves. Sufficient spacing reduces mis-taps, enhancing safety and user interaction.
2. Rectangular Icon:
The app menu icon's rectangular shape stands out from the circular icons, aiding quick navigation and adhering to Gestalt's Law of Similarity for interface clarity.
Usability Considerations:
The dock prioritizes usability with easily accessible and distinguishable icons, facilitating intuitive navigation through functions like maps, music settings, app management, system configuration, and issue reporting.
Enhanced interaction design follows Fitts' Law, optimizing touch input accuracy and accommodating practical challenges like gloved hands, ensuring precise and deliberate interactions during riding.
6.Motion-Sensitive Features:
Dock Auto-Hide:
The dock automatically hides to minimize distractions, ensuring that riders focus on the road rather than interactive elements.
Enlarged Display Elements:
Elements around the speedometer, such as battery temperature and trip information, enlarge to utilize the available screen real estate effectively. This enlargement aids readability during riding conditions.
Interactive Limitations:
To prevent distractions and potential hazards:
Touchscreen Disablement: During motion or adverse weather conditions (e.g., rain), the touchscreen functionality is disabled in totality and the background of pill-shaped indicators around the speedometer is hidden, indicating their non-intractability to minimize distractions and ensure rider focus on the road.
Visual Simplification: Non-essential elements, like detailed 3D model animations, reduce in size and complexity to maintain focus on essential driving information.
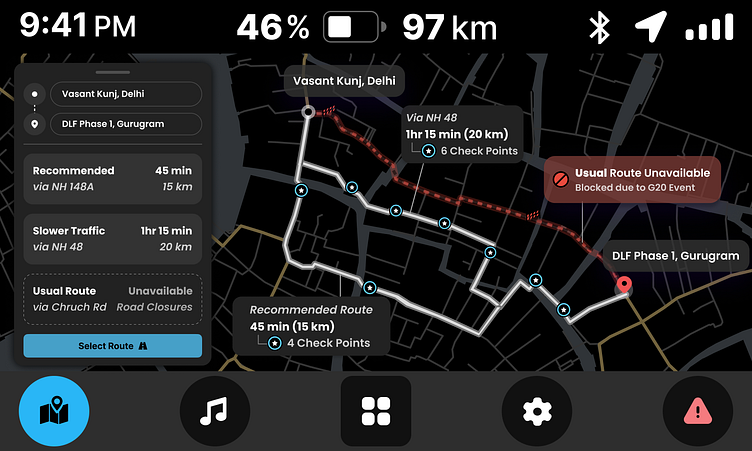
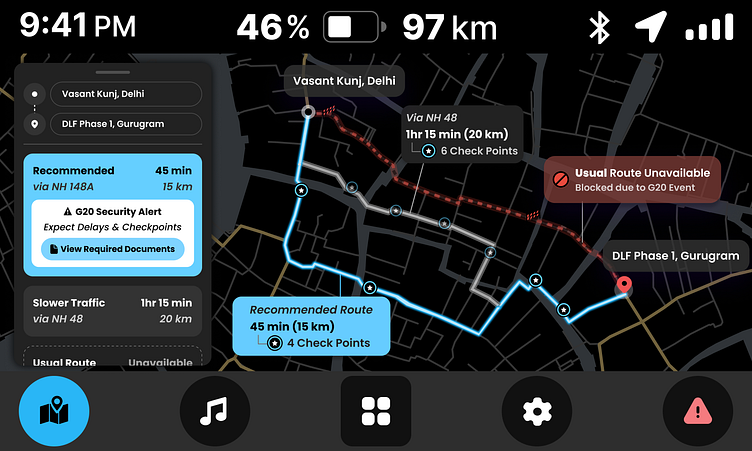
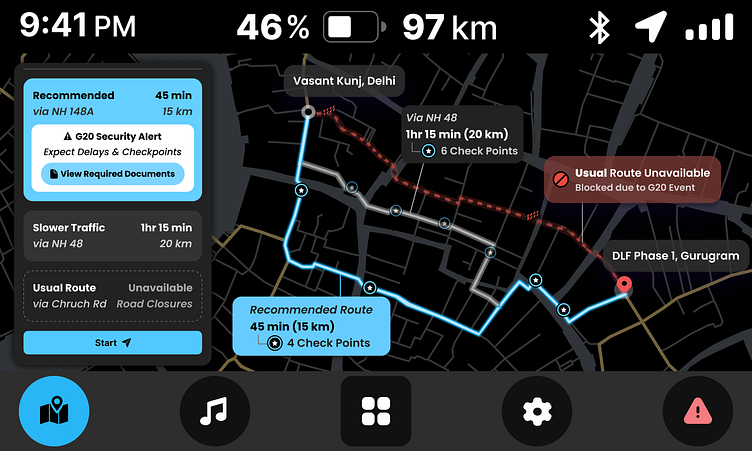
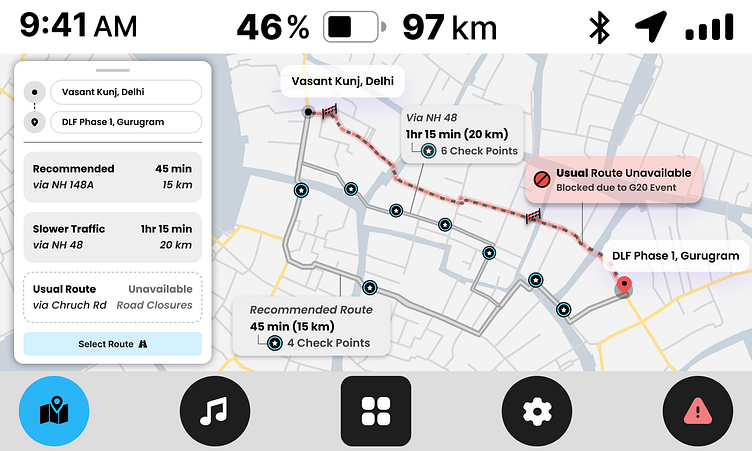
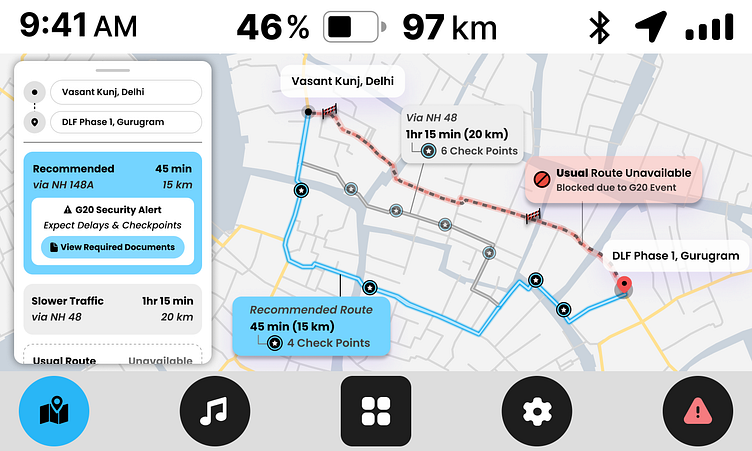
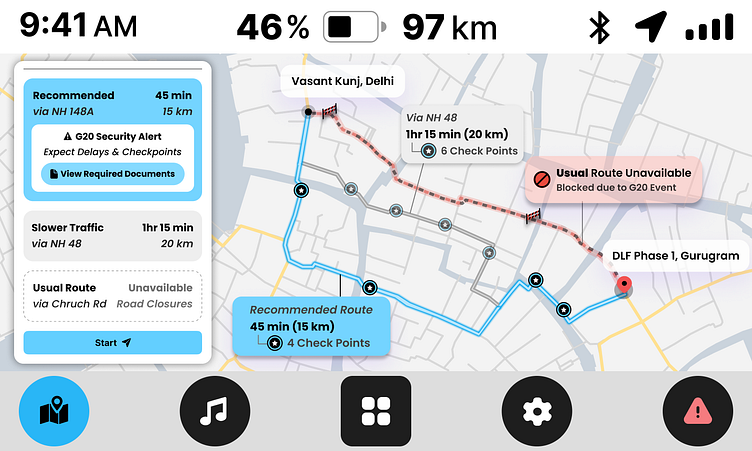
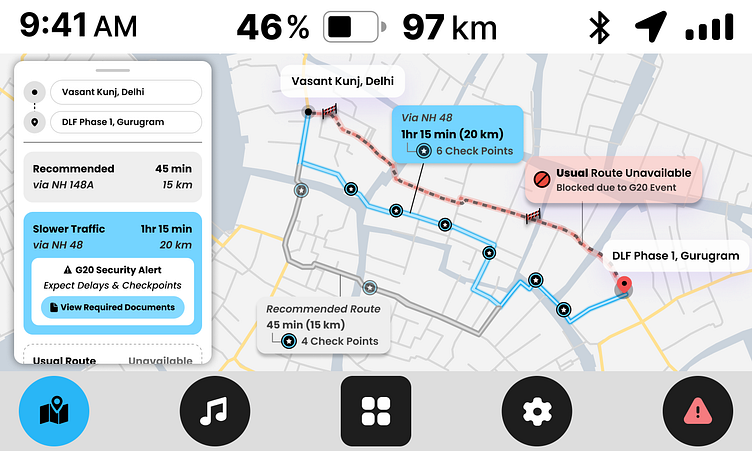
Navigation View :
Special Event Contextual UI UX Design - G20 Event in New Delhi

To collaborate contact me at :
shreyasjswork@gmail.com
I specialize in crafting compelling and empathetic user experiences that drive conversions through the fusion of design ,psychology and neuromarketing.