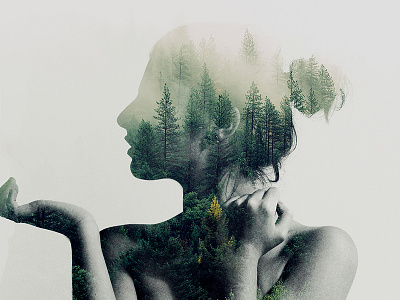
Double Exposure Photoshop Action
Double Exposure Action - a great tool for a photographer or designer. Create a wonderful effect of double exposure in a few seconds. After action finished work, you can add a color tone, or gradient to your composition. This effect is one of the leading places on the number of sales for many months!
Watch detailed video tutorial for this action HERE
Updated! Added Multilingual versions.
Now it's works with English, German, French, Italian and Spanish version of Photoshop. You no need to change language in your Photoshop. Use Photoshop on your native language!
If your language is no in the list of languages is not a problem! How to change language in photoshop watch here WATCH HERE
This action created and optimized for use on Photoshop CS3, CS4, CS5, CS6, CC
Awesome backgrounds here: https://unsplash.com
If you have any problems with the action, please visit this help page with answers to FAQ, and recommendations for optimal use of my actions.
If you do not find an answer to your question here, and you still have a problem with my actions, please contact me on my e-mail
How to set up your Photoshop for work with actions.
1. Make sure you are using the English version of Photoshop.
Every my action works only with the English version of Photoshop, please make sure that you have the English version of Photoshop. If not, then it's no problem.
You can change the language of your version of Photoshop to English and then bring it back using this method
By the way, my best selling Double Exposure Action recently been updated, and now you can use it in English, German, French, Italian and Spanish versions of Photoshop.
2. Use the RGB Mode and 8 Bits color.
To check this, Go to: Image->Mode and check the "RGB color" and "8 Bits/Channel";
3. Make sure that the option "Add" copy "to Copied Layers and Groups" turned on.
This option applies only in CS5 and more highest versions of Photoshop. Click on menu icon at the right on "LAYERS" panel and go to "Panel Options...",
and check the "Add" copy "to Copied Layers and Groups".
4. Use a photo with 72dpi or higher.
If you are using the photo below 72dpi, the action will not work correctly.
To fix this, go Image->Image Size and increase a resolution value.
5. Set the Opacity of brush to 100%.
For that select "Brush Tool" and move the opacity slider to 100%.
How to combine my actions?
1. Open your photo
2. Play the first action
3. Save the result like image
4. Open the previosly saved image
5. Play second action
Photos used in preview are not included.
Please don’t forget to rate if you like it!

